
This easy quilting pattern, which is just as acceptable as the Wavy Grid Quilting Pattern, can also be finished within an hour. This quilting pattern works well for quilts with an even number of columns and an odd number of rows. It is a continuous pattern. This means that if it is accomplished without mistakes or running out of thread there will be only one beginning for each colored dashed line.
Machine Settings:
- Straight stitch length = 10 to 12 stitches per inch or any open and fast decorative stitch
- “Stitch in the Ditch” presser foot or an “Open Toe” presser foot in order to follow the seams in the quilt and that PREVENTS the needle from smashing into the foot.
- Walking Foot for best results but if you do not have one, baste your quilt sandwich every two inches with a needle and thread using the padding stitch.
Quilting Stitches:
Use your favorite basting method to prepare the quilt sandwich. Temporarily mark the starting block with something that won’t fall off and won’t be dangerous to sew around. Place this marked block in the lower left hand corner to remain oriented while reading these directions. Back-tack to secure all seams at both ends.
There will be a number of instances where the sewing is doubled up. In these instances, lengthen the stitch length to about 6 to 8 stitches per inch to prevent over stitching in these areas. Return to the 10 to 12 stitch length to continue quilting areas that have not yet been quilted.

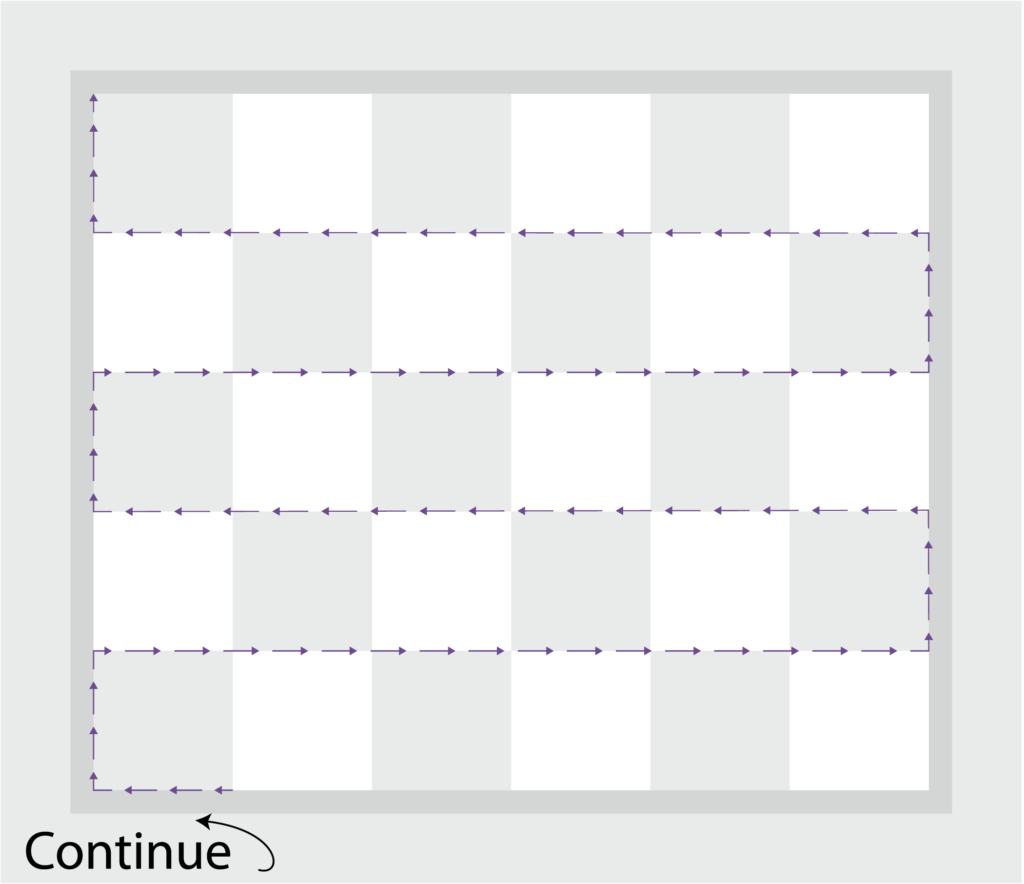
Step 1. Begin where indicated and follow the seams in the quilt top to quilt a vertical rectangle around the second column of blocks. Quilt in the direction of the arrows. At every corner, put the needle down and lift the presser foot to rotate the quilt.

Step 2. Continue following the seams by turning the corners every time you reach the inner border seam. After following the last vertical seam, sew to the corner as illustrated.

Step 3. Turn the corner and sew down to the next block. Now start sewing the first set of diagonal quilting stitches. While sewing, always sight down to the next corner visually aligning the current needle position with the next corner in front of the needle.
Step 4. Sew around the corner block to the next block above it. Sew the horizontal rows of quilting stitches up to the corner block in the top left corner.
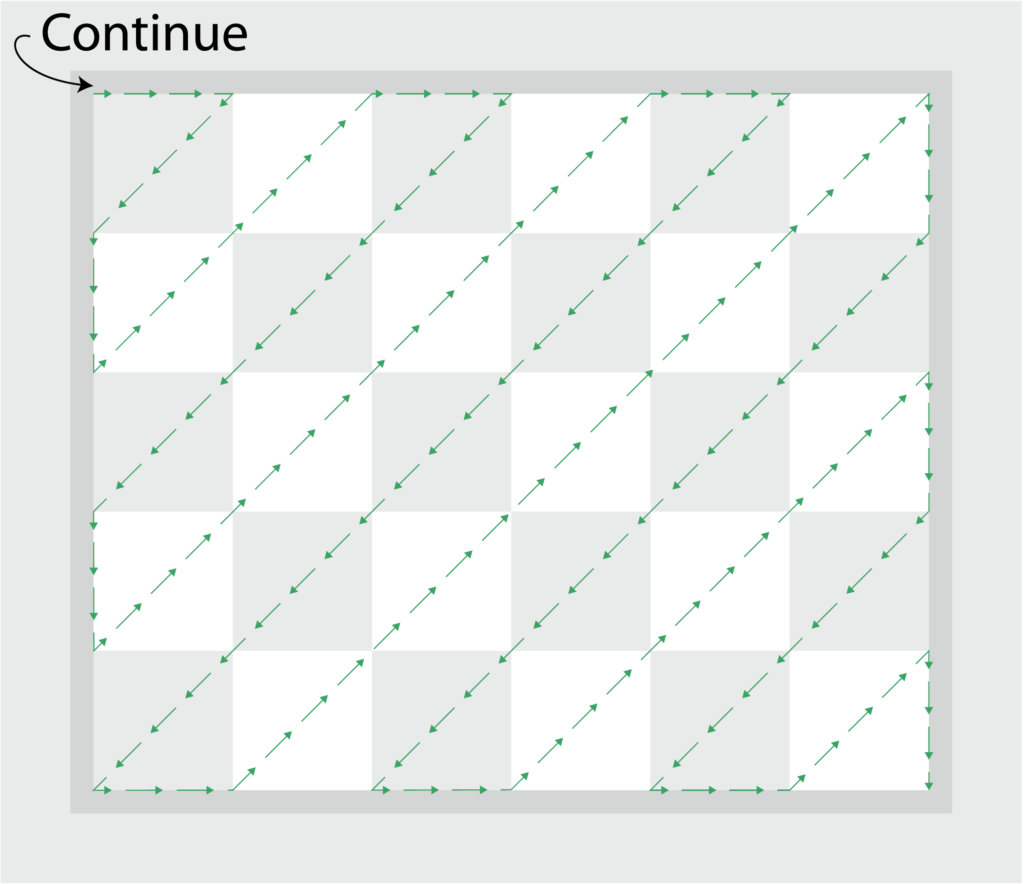
Step 5. Sew the second diagonal rows of stitching down to the opposite corner.
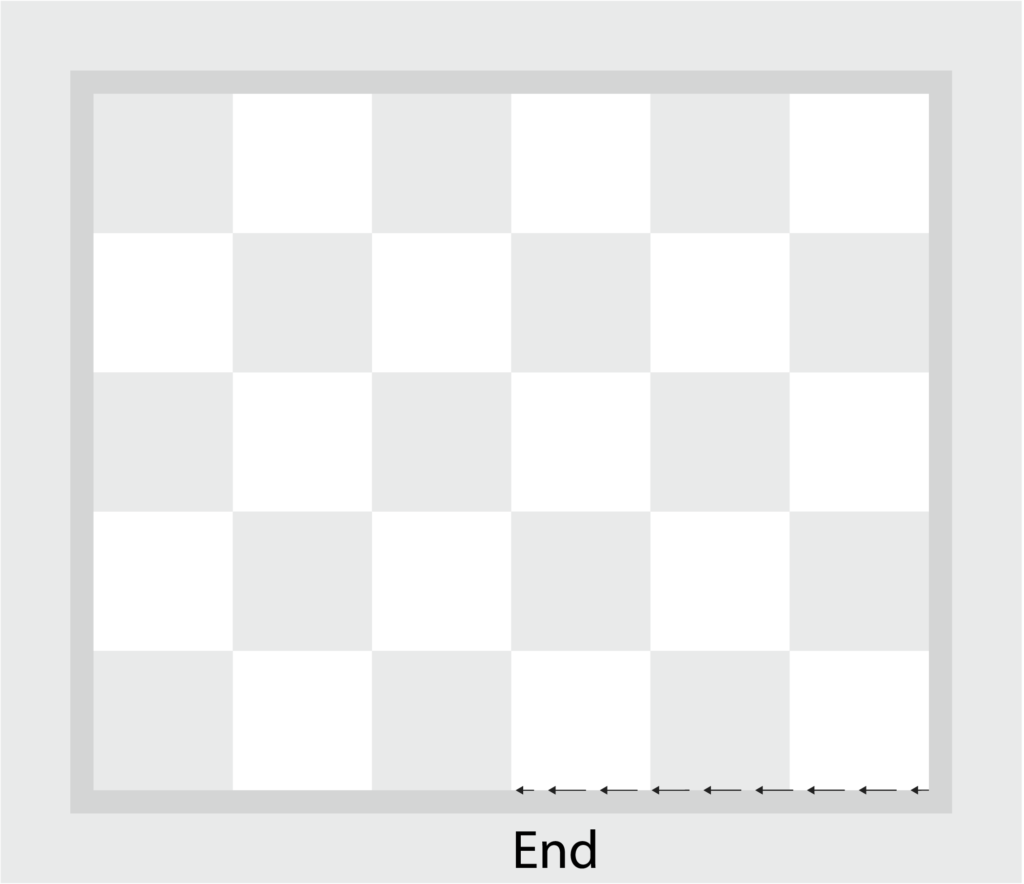
Step 6. Sew along the inner border seam until all blocks have been quilted along this edge. When you come to blocks that have already been quilted, put your needle down in the corner of the block. Change to a straight stitch and then stitch in the ditch over to the next block that needs to be quilt. Change back to any decorative stitch used at the next corner that has not been quilted.
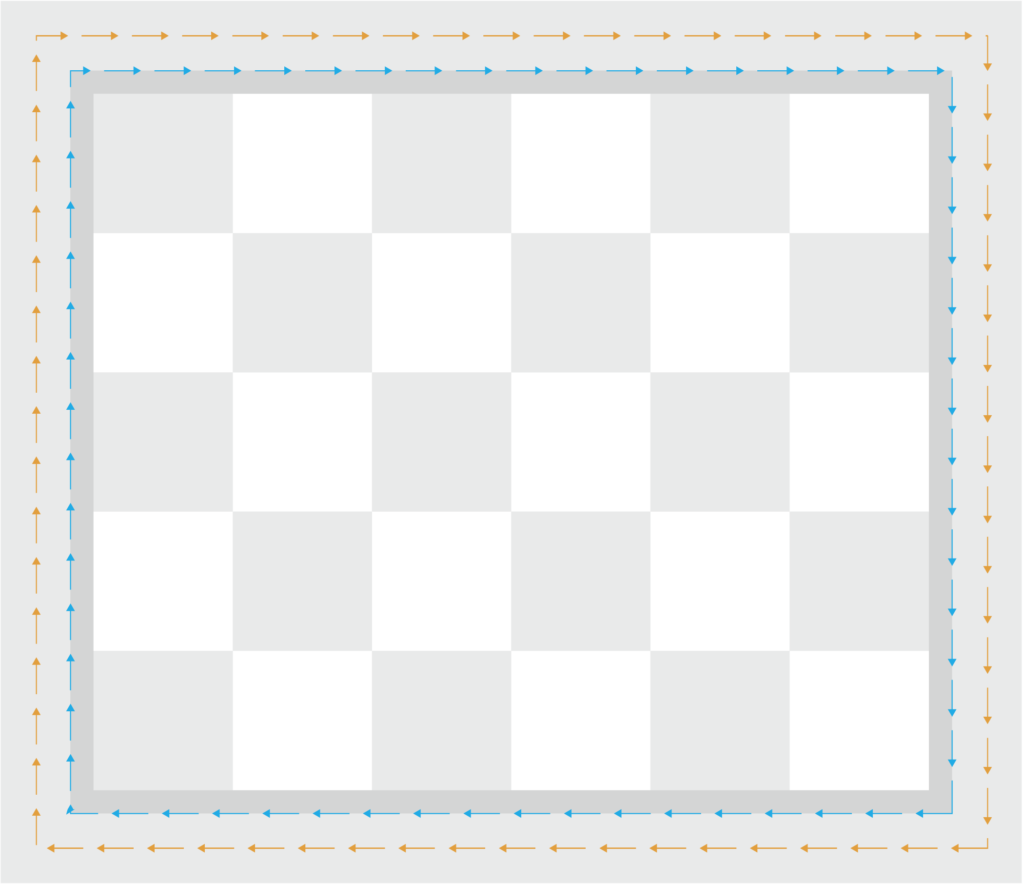
Step 7. Sew around the outside edge of the inner border (teal arrows) then again in the center of the outer border (orange arrows) and the quilting is finished.
Leave a Reply