
Stitch a simple diamond quilt pattern either continuously or discontinuously. Both are easy. And, both can be stitched on a regular sewing machine.
Preparation for the Diamond Quilt Pattern:
Tools Needed:
- A temporary making pen, pencil, or chalk designed for fabric
- A yardstick or long straight-edge
- A 24″ long or longer see-through rotary ruler
- One completely basted quilt sandwich
First, the Math:
- After basting the quilt sandwich, decide which diamond quilt pattern to sew in the quilt field: the Discontinuous Diamond Quilt Pattern or the Continuous Diamond Quilt Pattern.
- Choose the number of parallel lines to quilt. Smaller numbers create larger diamonds. Larger numbers create smaller diamonds. The Discontinuous Diamond Quilt Pattern uses an odd number of lines. And, the Continuous Diamond Quilt Pattern uses an even number of lines. For Quilts for Kids kits, 16 to 17 parallel lines places the stitching lines roughly 2” apart.
- Measure the distance between two opposite corners along the longest diagonal. Divide this measurement by your chosen number. Round the result DOWN to the nearest length mark on a ruler. Now, mark parallel lines separated by this distance.
Second, The Markings:
- For the Discontinuous Diamond Quilt Pattern: Draw parallel lines. Work from one corner to the opposite corner. Use any angle to get started. Then, just keep the lines parallel. But, do not draw the crossing lines until after the first set of parallel lines have been stitched.
- For the Continuous Diamond Quilt Pattern: Start by drawing a really big “X” connecting opposite corners. Always keep all lines parallel to the “X.” Draw all the lines needed to illustrate the full diamond pattern before stitching any of the pattern. And remember, temporary marks tend to fade with excessive handling.
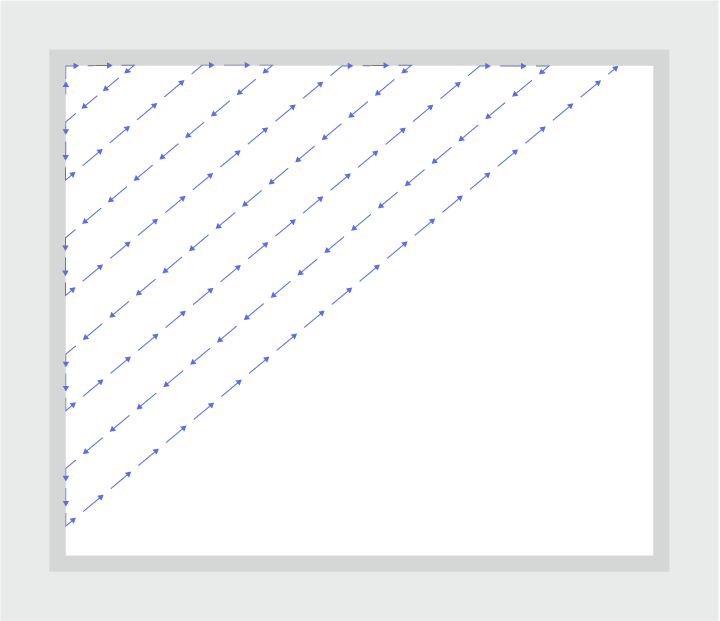
Sew the Discontinuous Diamond Quilt Pattern
- Lay the quilt sandwich flat as illustrated below, and refer back to this orientation.
- Start in the lower right corner.
- Sew a zig-zagging pattern following the green arrows up to the opposite corner securing the stitching at both ends.
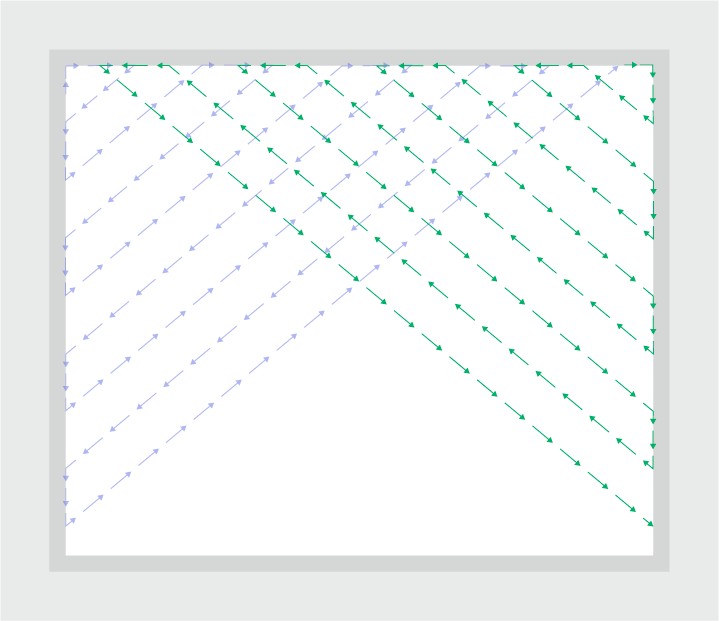
- Reorient the quilt as illustrated here. Draw the second set of parallel lines.
- Repeat Steps 1-3. above for the second set of diagonal lines. This time follow the red arrows.


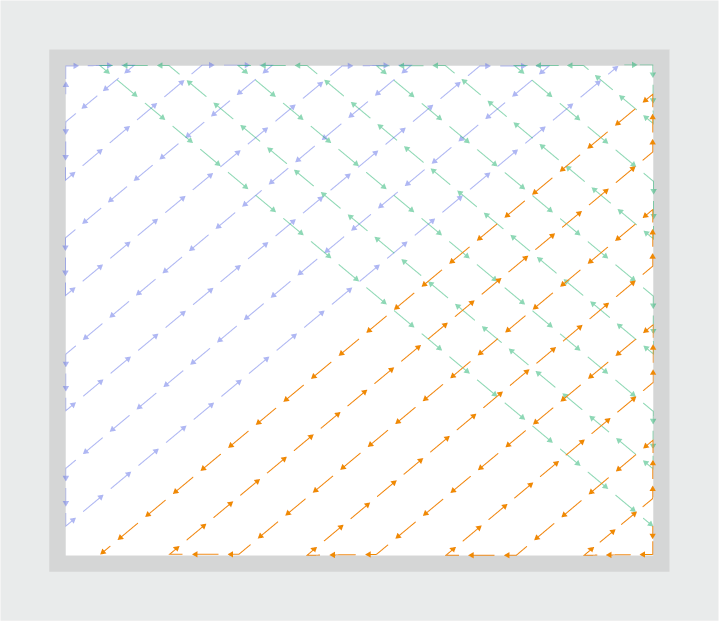
Sew the Continuous Diamond Quilt Pattern
First quadrant
- Start near the top left corner.
- Stitch-in-the-ditch following the purple arrows to quilt the quadrant’s corner.
- Continue in the ditch to the first diagonal line. Stitch-in-the-ditch every time the needle arrives at the inner edge of the inner border.
- Stitch along the diagonal line.
- Each time the needle arrives at the inner border, pivot away from the quadrant’s corner. Do not stitch-in-the-ditch around a corner without first starting a new quadrant. Each corner marks the start and end of a quadrant.
- Lower the needle into the quilt to hold it in place and reorient the quilt to begin the next quadrant.
Second, Third & fourth Quadrants
Repeat the sewing instructions for the first quadrant to complete the second, third, and fourth quadrants. But for each quadrant, A) follow the colored arrows for the current quadrant, and B) mark the current quadrant’s corner with a safety-pin to prevent confusion when sewing Step 4.

Stop the needle at the same point where the first quadrant started and secure the stitching. The quilt field is now complete, yet the borders need to be quilted.
Borders & Binding
- Stitch-in-the-ditch around the inside and outside edges of the inner border. Use an open decorative stitch to cover any stitch-in-the-ditch mistakes.
- Stitch all around the outer border through the center.
- Bind the quilt with your preferred method. Machine self-binding is best for quilts donated to Quilts for Kids.
Leave a Reply